Easy Origami Pirate Hat Tutorial: Step-by-Step
How to Fold an Origami Pirate Hat that’s ready for adventure! Imagine a classic, jaunty pirate hat, complete with a wide brim and a proud, upright crown – perfect for any budding buccaneer. This super simple origami project is ideal for complete beginners, especially kids, and makes a fantastic, quick craft for a party or just for fun. In about 5 minutes, you’ll transform a single sheet of paper into your very own treasure-hunting headwear! We’ll walk through each easy fold step-by-step, so grab your paper and let’s get ready to set sail on a fun folding journey!
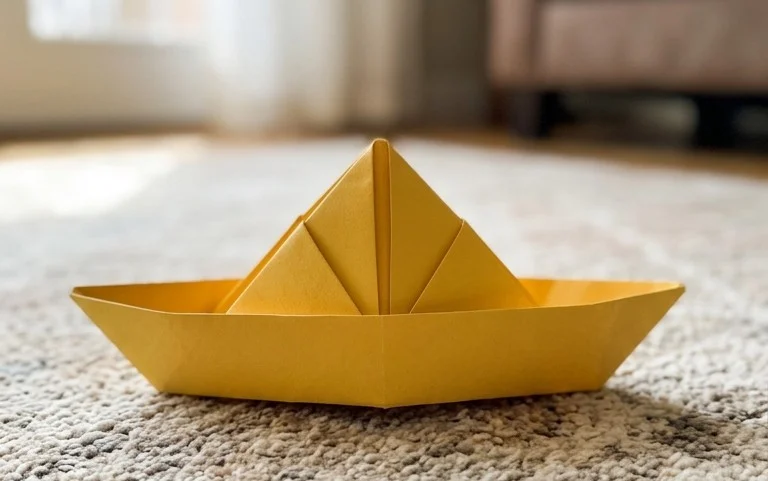
How to Fold an Origami Pirate Hat
Ahoy there, matey! Ready to set sail on a crafting adventure? Today, we’re going to learn how to fold a classic origami pirate hat. It’s a simple, yet incredibly satisfying fold that’s perfect for a bit of fun, for costumes, or even just as a delightful little desk decoration. Don’t worry if you’re new to origami; I’ll guide you through every single step in plain language, so you’ll have your very own pirate hat in no time. We’ll cover everything you need to know, from choosing the right paper to troubleshooting common mistakes and even some ideas for making your hat truly your own.
Choosing Your Treasure: The Right Paper
Let’s talk about paper! For this pirate hat, the beauty is in its simplicity, and you don’t need anything fancy.
* **Type of Paper:** Standard copier paper (also known as printer paper) is absolutely perfect. It’s readily available, comes in a great range of colours, and has just the right amount of crispness for these folds. You can also use dedicated origami paper, which is often a little thinner and stronger, but copier paper works wonderfully for this project.
* **Weight:** The standard weight for copier paper is around 70-80 gsm (grams per square meter). This is ideal. If the paper is too thick, it will be difficult to make crisp folds, and the hat might feel bulky. If it’s too thin, it might not hold its shape well.
* **Size:** For a good-sized pirate hat that’s wearable (if you have a smaller head or for a child), a standard A4 sheet of paper or an 8.5 x 11 inch sheet is a great starting point. If you want a smaller, decorative hat, you can easily scale down the paper size.
* **Single or Double-Sided:** For this particular fold, it doesn’t really matter if your paper is single or double-sided. However, if you want a pirate hat with a coloured brim and a contrasting crown, choosing double-sided paper can add a fun visual touch. If you use single-sided paper, the “wrong” side of the paper will show on the inside of the hat and on the brim.
The Foundation: Base Folds and Crispness
Before we dive into the hat itself, let’s talk about making those crucial folds nice and sharp. In origami, crisp folds are key to a neat and well-formed model.
* **How to Make a Crisp Fold:** When you bring two edges or corners together, align them precisely. Once aligned, use your finger to firmly run along the crease. You can even use your thumbnail for extra pressure, but be gentle if you’re using coloured paper to avoid smudging. Think of it as “ironing” the fold.
* **The Half Fold:** This is the most fundamental fold. You’ll take one edge of your paper and bring it to meet the opposite edge, creating a long rectangle. Make sure the corners and edges match up perfectly before creasing.
* **The Diagonal Fold:** This involves bringing one corner of your paper to meet the opposite corner, creating a triangle. Again, precision in aligning the corners and edges is important for a good result.
Your Step-by-Step Guide to Folding the Pirate Hat
Alright, let’s get folding! Imagine your paper is lying flat in front of you in landscape orientation (the long side is horizontal).
1. **First Fold: The Half Fold.** Take the top edge of your paper and bring it down to meet the bottom edge. Align the corners and the edges as perfectly as you can. Crease the fold firmly down the middle. You should now have a long, narrow rectangle.
2. **Second Fold: Another Half Fold.** With your rectangle still in front of you (the long, creased edge should be at the top), take the top edge and bring it down to meet the bottom edge again. Line up the corners and edges, and crease firmly. You will now have a much smaller, very narrow rectangle. This is your starting point.
3. **Unfold:** Carefully unfold the last fold you just made. You should have your rectangle from step 1 back, with a central crease line running horizontally across it.
4. **First Diagonal Fold:** Now, imagine the paper is in portrait orientation (the long side is vertical), with the crease you just made running horizontally across the middle. Take the top-left corner and bring it down to meet the horizontal crease line. Align the corner exactly on the crease and crease this fold firmly.
5. **Second Diagonal Fold:** Do the same with the top-right corner. Bring it down to meet the horizontal crease line. Align the corner precisely on the crease and crease this fold firmly. You should now have a shape that looks a bit like a house with a pointy roof, but the bottom edge is still the folded edge from your initial rectangle.
6. **Open the Top Flaps:** At the top of your shape, you’ll see two layers of paper, like the roof of a house. Gently separate these top two flaps. This is the brim of your hat that we will eventually fold up.
7. **First Brim Fold:** Take the top layer of paper at the very top edge (the pointed tip of your “house”) and fold it downwards. The edge you are folding should align with the horizontal edge of the triangle shape below it. Crease this fold firmly. This is the first part of your brim.
8. **Second Brim Fold:** Flip the entire model over. Now you’ll see the other side, which looks like the back of the “house.” Again, take the top layer of paper (the pointy tip on this side) and fold it downwards. Align this edge with the horizontal edge of the triangle below it, just as you did on the other side. Crease firmly.
9. **Tucking the Corners:** Now, look at the bottom edge of your model. You’ll have two small triangular flaps sticking out at the bottom corners. Take one of these flaps and fold it upwards and over the brim you just created. Crease it firmly.
10. **Tucking the Other Corner:** Flip the model over again. Take the remaining bottom triangular flap and fold it upwards and over the brim on this side. Crease firmly. This tucking action helps to secure the brim and give the hat its shape.
11. **Opening the Hat:** Gently reach inside the bottom opening of your model. Carefully pull the sides apart. You should see the hat begin to open up. Keep pulling gently until the hat forms its familiar shape. You might need to push down on the top to flatten it slightly and make it sit nicely.
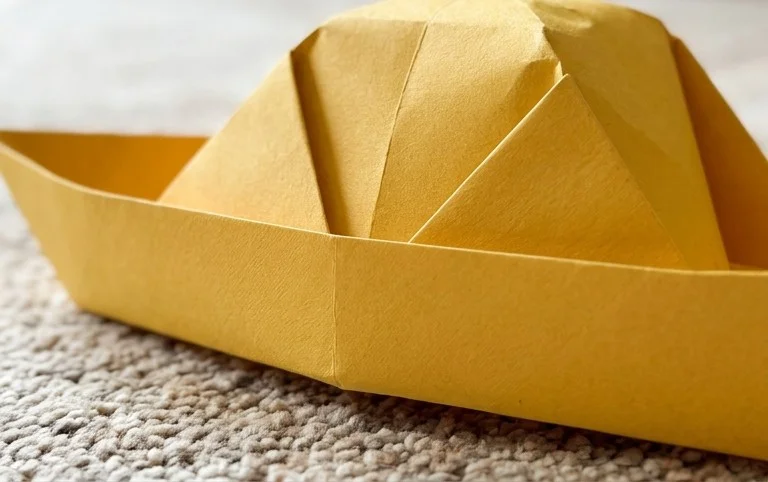
Congratulations! You’ve folded your very own origami pirate hat!
Beware the Kraken! Common Beginner Mistakes and How to Avoid Them
Even the most seasoned sailors sometimes get caught in a storm! Here are a couple of places where beginners often stumble, and how to steer clear:
* **Folds Not Meeting Exactly:** This is probably the most common pitfall. When you’re told to align a corner with an edge or another corner, take your time! Even a millimeter off can make a big difference by the end. Go back, unfold if you need to, and try again. The goal is precision.
* **Folds Not Crisp Enough:** If your folds are too soft, the hat will look a bit droopy and won’t hold its shape well. Remember to use your finger or thumbnail to really press down on each crease. Imagine you’re making a sharp line that you don’t want to disappear.
* **Confusing Which Way to Fold the Brim:** When it comes to folding the brim up, it’s easy to get mixed up about which layer to fold and which direction. Always make sure you’re folding down the *topmost point* of the paper on each side, aligning that edge with the horizontal base of the triangle below. And remember to do it on both sides!
Your Own Swashbuckling Style: Variations
The beauty of origami is you can make it your own! Here are some ideas to customize your pirate hat:
* **Size:** As mentioned, use different sized paper! A large sheet will make a big, impressive hat, while a small square will create a charming little hat perfect for a doll or a miniature scene.
* **Paper Patterns:** Go wild with paper! Use paper with skulls and crossbones, stripes, or even plain coloured paper that you can draw on later. Scrapbooking paper often has some fantastic thematic patterns.
* **Colour:** This is the easiest way to vary it. Red, black, white, and even striped paper all make fantastic pirate hats. Try a bright yellow for a particularly cheerful buccaneer!
* **Adding Details:** Once your hat is folded, you can glue on a feather, a fabric scrap, or even draw a Jolly Roger symbol on the brim with a marker.
Displaying Your Booty: Gifting and Presentation
Finished hat in hand, what do you do with it?
* **For Gifting:** These hats make wonderful small gifts. You can place them on top of a wrapped present for a surprise element. They’re also perfect for party favors for a pirate-themed birthday.
* **Decoration:** They look great lined up on a shelf, as part of a table centerpiece for a themed party, or even as part of a miniature village or diorama.
* **Playtime:** Of course, the most fun is to wear it! If you’ve made a larger one, it can be a fantastic addition to a child’s dress-up box.
So there you have it! Your very own origami pirate hat, folded with your own two hands. Keep practicing, and soon you’ll be folding them with the speed and skill of a seasoned sea dog. Happy folding, and may your adventures be grand!
Conclusion
Congratulations on folding your very own origami pirate hat! We hope you had a fantastic time bringing this classic paper creation to life. Don’t worry if your first origami pirate hat isn’t perfect; every fold is a learning experience. The beauty of origami is that practice makes progress, so keep folding!
We’d love to see your finished masterpiece! Share your origami pirate hat with friends and family – imagine a whole crew of paper pirates! For your next adventure, why not try folding a paper boat or a fearsome dragon? There are so many exciting paper projects waiting for you. Keep exploring the wonderful world of origami!
