Easy Cardboard Tube Flying Bee: Origami Paper Craft
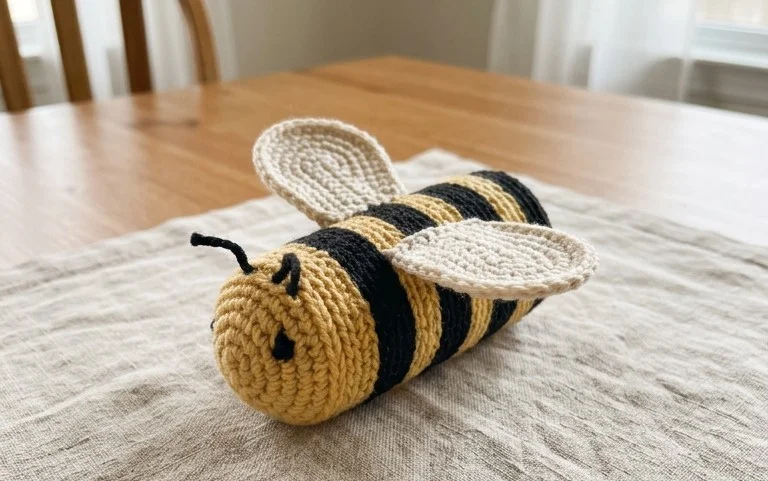
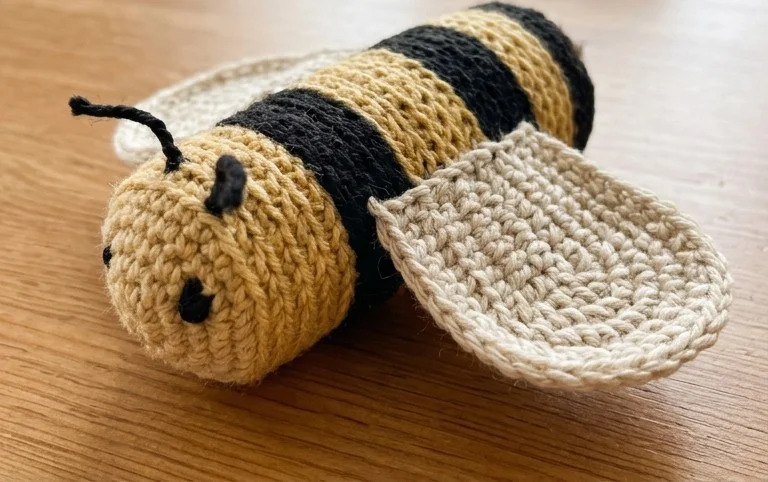
Cardboard Tube Flying Bee Crafts are buzzing with fun and creativity! Imagine a plump, fuzzy bee, its body made from a recycled cardboard tube, adorned with bright yellow and black stripes, and delicate, transparent wings that catch the light. This adorable little friend is ready to take flight! This project is perfect for complete beginners and especially wonderful for kids to make. It’s also a fantastic option for a handmade gift or a cheerful decoration to brighten any room. You can expect this delightful craft to take around 30-45 minutes from start to finish. Get ready to learn how to transform a simple tube into a charming flying bee, mastering easy folding techniques and simple decorating tips. Let’s get our hands sticky with glue and our imaginations soaring as we create these sweet little pollinators together!
Crafting Your Own Cardboard Tube Flying Bee: A Step-by-Step Origami Adventure
Welcome to the wonderful world of origami! Today, we’re going to create a delightful, three-dimensional bee using a humble cardboard tube and some simple paper folding techniques. This craft is perfect for all ages, offering a satisfying blend of crafting and origami, and the finished product is sure to bring a smile to your face. We’ll take it step by step, and I’ll be here to guide you through every fold. Don’t worry if you’re new to origami; we’ll make sure every fold is clear and easy to follow.
Choosing Your Paper: The Foundation of Your Flying Bee
The paper you choose is key to the success and aesthetic of your bee. For this project, I highly recommend using standard origami paper. This paper is specifically designed for folding, meaning it holds creases well and is thin enough to manage multiple layers without becoming too bulky.
* **Type:** Look for “origami paper” or “kami paper.” It’s usually a bit stiffer than regular printer paper and has a lovely matte finish.
* **Weight:** Standard origami paper is typically around 60-80 gsm (grams per square meter). This is the sweet spot for our bee – sturdy enough to hold its shape but not so thick that it’s difficult to fold.
* **Size:** For our cardboard tube bee, you’ll want squares of paper. Common origami paper sizes are 6 inches (15 cm) or 8 inches (20 cm). Either will work wonderfully. If you’re using larger squares, your bee will naturally be bigger.
* **Single or Double-Sided:** This is where you can get creative! For a classic bee, use yellow on one side and black on the other. This allows you to create distinct stripes and a sunny body. However, don’t be afraid to experiment! You could use patterned paper for the body, or even just plain white and color it in afterwards. For the wings, white or translucent paper (like vellum or tracing paper, if you have it) works beautifully.
The Base Folds: Building Blocks of Your Bee
Before we dive into the bee-specific folds, let’s master a couple of fundamental origami techniques that will make creating your bee a breeze.
The most important fold we’ll use is a clean valley fold. To make a valley fold, you bring two edges or corners together and press down firmly along the crease. For a really crisp fold, I like to run my fingernail along the crease. Imagine you’re “ironing” the fold.
We’ll also be using a mountain fold. A mountain fold is the opposite of a valley fold. You make a crease, and then fold the paper away from you along that crease, so the crease forms a peak, like a mountain range. To make mountain folds cleanly, it’s often easiest to make a valley fold first, then reverse the direction of the fold.
Your Flying Bee Fold Sequence: A Step-by-Step Journey
Let’s get started with the folding! We’ll start with the bee’s body.
1. Begin with your square of paper. If you have a yellow and black paper, place the yellow side facing up.
2. Fold the paper in half diagonally to form a triangle. Bring the bottom right corner up to meet the top left corner. Crease firmly. You should now have a triangle with the folded edge at the top and the open edges at the bottom.
3. Open the paper back up. You’ll see a diagonal crease.
4. Now, fold the paper in half diagonally in the other direction. Bring the bottom left corner up to meet the top right corner. Crease firmly.
5. Open the paper back up. You should now have two diagonal creases forming an ‘X’ on your paper.
6. Flip the paper over so the black side is facing up (if you’re using yellow and black).
7. Fold the paper in half horizontally. Bring the bottom edge up to meet the top edge. Crease firmly.
8. Open the paper back up. You’ll see a horizontal crease.
9. Fold the paper in half vertically. Bring the left edge over to meet the right edge. Crease firmly.
10. Open the paper back up. You should now have a horizontal crease and a vertical crease, along with the two diagonal creases.
11. Now, we’re going to collapse the paper into a square base. Hold the paper so the horizontal crease is a valley fold and the vertical crease is a valley fold. Gently push the left and right sides inwards. The top and bottom points will naturally come together, forming a smaller square. This is called a preliminary base. Press down firmly to flatten it. You should have a square with four flaps, two on each side.
12. With the open end of the square pointing towards you, take the top flap on the right side and fold its bottom edge upwards so it aligns with the center vertical crease. Crease firmly.
13. Repeat this on the left side with the top flap on the left. Fold its bottom edge upwards to meet the center vertical crease. Crease firmly. You should now have a kite shape on the top layer.
14. Flip the entire model over.
15. Repeat steps 12 and 13 on this side. Take the top flap on the right and fold its bottom edge to the center crease. Crease firmly. Then, take the top flap on the left and fold its bottom edge to the center crease. Crease firmly.
16. Now you have a shape that looks like a diamond with two pointy flaps on each side. Take the top pointy flap on the right side and fold it over to the left, so its edge aligns with the center vertical crease. Crease firmly.
17. Repeat step 16 with the top pointy flap on the left side, folding it over to the right so its edge aligns with the center vertical crease. Crease firmly.
18. Flip the model over.
19. Repeat steps 16 and 17 on this side. Fold the right pointy flap over to the left along the center crease, and then fold the left pointy flap over to the right along the center crease.
20. You now have a long, narrow diamond shape with two flaps on each side. Take the rightmost flap on the top layer and fold it upwards. The tip of this flap should meet the top point of the diamond. Crease firmly.
21. Repeat step 20 with the leftmost flap on the top layer. Fold it upwards so its tip meets the top point. Crease firmly.
22. Flip the model over.
23. Repeat steps 20 and 21 on this side. Fold the right flap upwards to the top point, and then the left flap upwards to the top point.
24. Now you have a shape that looks like a very long, thin kite. This will form the bee’s body. You will have four “legs” at the bottom.
25. Gently open the body by pulling the two sides apart. You’ll see a central channel.
26. Now, for the wings. Take a separate square of white or translucent paper. Fold it in half diagonally to make a triangle. Crease firmly.
27. Open the paper back up.
28. Fold the two bottom edges of the triangle up to meet the center diagonal crease. This creates a kite shape. Crease firmly.
29. Fold this kite in half vertically, bringing the right edge to meet the left edge. Crease firmly. This creates a long, thin wing shape.
30. Repeat steps 26-29 to make a second wing.
31. Now, let’s attach the wings. Take your bee body. Gently insert the base of one wing into the opening of the body, just under one of the flaps. The wing should stick out from the side. You can secure it with a tiny dab of glue or tape if you wish, but often a snug fit is enough.
32. Insert the second wing into the opening on the other side of the bee body.
Now, to make it a “flying” bee, we need to add the cardboard tube.
33. Take your cardboard tube (a toilet paper roll or a cut paper towel roll works perfectly).
34. Apply a line of glue or double-sided tape along the top edge of the cardboard tube.
35. Carefully place the base of your folded origami bee onto the glued edge of the cardboard tube, so the body drapes over the tube. Press gently to secure. The tube will act as the bee’s body, giving it a sturdy and slightly puffed-out appearance.
You can now gently pull the four “legs” of the bee outwards to give it a more realistic shape.
Common Beginner Pitfalls and How to Avoid Them
It’s completely normal to encounter a few bumps along the road when learning origami. Here are some common issues and how to overcome them:
* **Fussy Folds:** This is probably the most common problem. If your folds aren’t crisp, the paper won’t align correctly in subsequent steps, and your model might look a bit wonky.
* **How to Avoid:** Be patient! Before you make any fold, look closely at the instructions. Align the edges or corners precisely. Once aligned, run your fingernail firmly along the fold line. Don’t be afraid to use a bit of pressure to get a sharp crease.
* **Misinterpreting Fold Directions:** Sometimes, it’s easy to get confused about whether a fold should be a valley fold or a mountain fold, especially in the earlier stages.
* **How to Avoid:** Pay close attention to the language. “Bring corner X to edge Y” usually implies a valley fold. If a step involves reversing a fold, try to visualize it. If you’re unsure, make a valley fold first, and then reverse it to create the mountain fold. Looking at diagrams can be incredibly helpful here, even if you’re primarily following written instructions.
* **Crushing the Model:** As you get further into the folds, you might accidentally unfold or crush previous folds.
* **How to Avoid:** Handle your origami gently. Once a fold is made, try to keep that section of the paper stable while you work on other parts. Imagine you’re working with delicate glass – precision and a light touch are key.
Varying Your Bee: A Splash of Personal Style
The beauty of crafting is personalization! Here’s how you can make your flying bee truly unique:
* **Size:** As mentioned, larger squares of paper will result in a larger bee, and smaller squares will create a daintier one. You can also cut your own squares from larger sheets of paper.
* **Paper Pattern and Colour:** Forget yellow and black! Use floral patterns for a garden bee, metallic paper for a sparkly bee, or even plain coloured paper that you decorate with markers or paint afterwards. For the wings, try patterned paper too!
* **Adding Details:** You can draw on little eyes with a fine-tip black marker. Tiny antennae made from thin wire or pipe cleaners can be attached to the head. You could even add little legs from pipe cleaners if you want to go the extra mile.
Displaying and Gifting Your Creation
Your origami bee is more than just a craft; it’s a little piece of art! Here are some ideas for showcasing your hard work:
* **Mobile:** Attach several bees to a mobile structure, perhaps with some paper flowers or leaves. Hang it in a child’s room or near a window.
* **Garland:** String several bees together on a piece of twine or ribbon to create a cheerful garland for parties or seasonal decorations.
* **Gift Topper:** Attach a single bee to the top of a gift for an extra special touch.
* **Desk Buddy:** Simply place your bee on your desk or bookshelf as a charming companion.
* **Sensory Play:** For younger children, the cardboard tube base makes it a wonderful, durable toy for pretend play.
Creating this origami bee is a journey, and each fold brings you closer to a buzzing success. Enjoy the process, embrace any imperfections as unique characteristics, and have fun bringing your little flying friends to life!
Conclusion
Congratulations on completing your wonderful Cardboard Tube Flying Bee craft! We hope you had a delightful time bringing this buzzing friend to life. Remember, every artist’s first attempt is a valuable learning experience, so don’t worry if it wasn’t perfect – that’s what practice is for! We’d love to see your finished bee; feel free to share photos with your family and friends.
Feeling inspired to create more? Try adding a fluffy tail for a bumblebee variation, or perhaps paint stripes for a bold, striking look. And don’t stop here! Explore our other paper crafting projects for more exciting adventures in creativity.