Easy Origami Twisted Green Paper Ribbon Tutorial
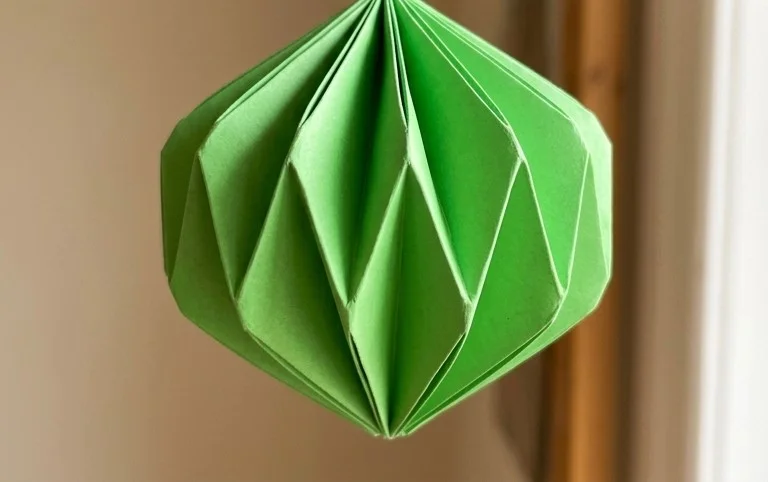
Twisted Paper Ribbon in Green is such a fun and surprisingly simple project that I’m so excited to share with you today! Imagine a beautiful, flowing green ribbon, not flat and smooth, but with delightful twists and turns that catch the light and add dimension. It looks like it’s dancing! This project is absolutely perfect for complete beginners, and it’s also a fantastic way to keep kids entertained and engaged. In under 15 minutes, you’ll have a charming piece that’s wonderful for decorating cards, gifts, or even as a standalone decoration. We’ll be focusing on just a few easy folds and the magic of twisting paper. Get your green paper ready, and let’s create something lovely together!
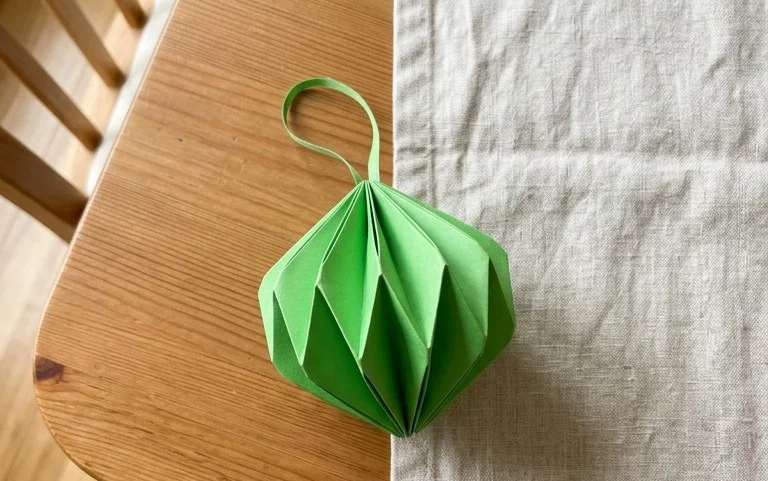
Crafting a Verdant Twist: Your Guide to Twisted Paper Ribbon
Hello there! I’m so excited to guide you through creating a beautiful twisted paper ribbon, perfect for adding a touch of handmade charm to your projects. This is a wonderfully accessible origami model, and with a little patience, you’ll be able to produce stunning results. We’ll be focusing on a lovely green shade for our ribbon today, bringing a fresh, natural feel to whatever you adorn. Don’t worry if you’re new to origami; I’ll break down every step in plain language, assuming you have no prior experience. Let’s get started on this rewarding folding adventure!
Choosing Your Perfect Paper
The paper is truly the foundation of any origami piece, and for our twisted ribbon, the choice is important. I recommend using standard origami paper for this project.
* **Type:** Traditional origami paper is ideal. It’s thin enough to fold cleanly without becoming bulky, yet strong enough to hold its shape. You can find this at most craft stores or online origami suppliers. Printer paper is too thick and will make the final ribbon stiff and potentially difficult to fold precisely.
* **Weight:** Origami paper typically ranges from 70 to 100 gsm (grams per square meter). Either end of this spectrum works well for this model. If you want a crisper, more defined ribbon, a slightly heavier paper might be nice, but standard 70-80 gsm is perfectly fine.
* **Size:** For a beginner-friendly ribbon that’s a good size for most applications, I suggest starting with a square piece of paper that is 15 cm x 15 cm (approximately 6 inches x 6 inches). This size is manageable and allows you to practice the folds without them becoming too fiddly.
* **Single or Double-Sided:** For this specific project, a single-sided sheet of paper is generally preferred. This is because the inside of the ribbon will be the uncolored side of the paper. If you use double-sided paper where both sides are green, that’s also perfectly acceptable and will result in a uniformly green ribbon. However, using single-sided paper with a contrasting white or colored back can create a subtle depth and dimension as the layers twist. We’re aiming for a rich green here, so a paper with a vibrant green on one side and white on the other will look lovely.
Mastering the Base Folds: The Foundation of Your Ribbon
Before we dive into the twisting, there are a couple of fundamental folds we need to execute cleanly. These are the building blocks of many origami models, and getting them right will make the rest of the process much smoother.
The first essential fold is the “valley fold.” Imagine folding a piece of paper in half so that the crease forms a valley. This is achieved by bringing one edge or corner to meet another, then pressing down firmly along the line where they meet to create a sharp crease. The opposite of this is a “mountain fold,” where the crease bulges upwards like a mountain peak. For this ribbon, we’ll mostly be using valley folds.
The second crucial base fold is creating a perfect diagonal fold. This means bringing one corner of your square paper to meet the opposite corner precisely. It’s vital to align the corners accurately and then make a sharp crease running diagonally across the square. Repeat this on the other diagonal. These diagonal creases will act as guides for our subsequent steps.
Your Step-by-Step Folding Sequence
Let’s begin folding your beautiful green ribbon! Remember to take your time and make each crease as sharp as possible by running your fingernail along it.
1. Start with your green paper, colored side up. Fold the paper in half diagonally by bringing the bottom-left corner up to meet the top-right corner. Crease firmly. Unfold.
2. Now, fold the paper in half diagonally again, this time bringing the bottom-right corner up to meet the top-left corner. Crease firmly. Unfold. You should now have an ‘X’ shape creased into your paper.
3. Flip the paper over so the white side is facing up.
4. Fold the paper in half horizontally by bringing the bottom edge up to meet the top edge. Crease firmly. Unfold.
5. Fold the paper in half vertically by bringing the left edge over to meet the right edge. Crease firmly. Unfold. You should now have a ‘+’ shape creased into your paper, in addition to the ‘X’ from before.
6. Pick up your paper. Gently push the left and right sides inwards towards the center. As you do this, the top and bottom points should naturally come together, collapsing the paper into a smaller square. This is called a “preliminary base” or “square base.” You should have a square shape with four flaps, all pointing downwards. The raw edges are at the bottom.
7. With the open end of the square base pointing towards you, take the top layer of the right flap. Bring its bottom edge up to align with the center vertical crease. Crease firmly.
8. Repeat step 7 with the top layer of the left flap, bringing its bottom edge to align with the center vertical crease. Crease firmly. Your paper should now look like a kite shape on the top layer.
9. Flip the entire model over.
10. Repeat steps 7 and 8 on this side. Bring the bottom edge of the top-right flap to the center crease, and then the bottom edge of the top-left flap to the center crease. You should now have a symmetrical kite shape on both sides.
11. Now, take the small triangular flap that sticks out at the top of the kite shape (on the side facing you). Fold this triangle downwards, so its point meets the point where the two side flaps meet the center crease. Crease firmly.
12. Flip the model over and repeat step 11 on this side. Fold the top triangle down to meet the intersection point.
13. You should now see two ‘legs’ or points at the bottom of your model. Take the right ‘leg’. Fold its outer edge in to meet the center vertical crease. Crease firmly.
14. Repeat step 13 with the left ‘leg’, folding its outer edge in to meet the center vertical crease. Crease firmly.
15. Flip the model over and repeat steps 13 and 14 on this side. Fold the outer edge of the right leg to the center, then the outer edge of the left leg to the center. Your model should now be a long, thin diamond shape.
16. Now for the twist! Look at the two ‘points’ at the top of your diamond. Gently pull these two points outwards and slightly apart. As you do this, the center of the model should naturally start to twist.
17. You’ll see the paper beginning to form a ribbon. Continue to gently pull the top points apart, encouraging the twist. You can use your fingers to guide the paper, coaxing it into a spiraled ribbon shape. The creases you made earlier will help it hold its form.
18. Keep twisting and adjusting until you have a pleasing ribbon shape. You can make the twist tighter or looser depending on your preference. Once you’re happy, press firmly along the entire length of the ribbon to set the twist.
Congratulations! You’ve just folded your own beautiful twisted paper ribbon!
Common Pitfalls and How to Avoid Them
It’s completely normal to encounter a few bumps along the road when learning origami. Here are a couple of common mistakes beginners make with this model and how to sidestep them:
* **Uneven Creases:** This is perhaps the most common issue. If your creases aren’t sharp and precise, the paper won’t fold accurately in later steps, leading to a lopsided or messy ribbon.
* **How to Avoid:** Always use the side of your fingernail or a bone folder (if you have one) to press down firmly along every fold. Ensure the edges and corners you’re bringing together are perfectly aligned *before* you crease. Don’t be afraid to unfold and re-crease if you notice an alignment issue early on. Patience is key here!
* **Difficulty with the Initial Collapse (Preliminary Base):** Step 6, where the paper collapses into a square base, can be a bit tricky the first time. If you try to force it, you can end up with rumpled paper.
* **How to Avoid:** Make sure your horizontal and vertical folds (steps 4 and 5) are well-creased, as these will guide the collapse. Instead of pushing hard, gently encourage the sides inwards. Visualize the paper being guided by those creases. The diagonal creases you made earlier will also help the paper fold in on itself. It’s like a gentle origami magic trick!
Adding Your Personal Touch: Variations to Explore
Once you’ve mastered the basic green ribbon, don’t hesitate to experiment! Origami is all about creativity, and this model offers several easy ways to personalize it:
* **Size:** Simply start with a larger or smaller square piece of paper. A 20cm x 20cm square will give you a longer, wider ribbon, while a 10cm x 10cm square will produce a daintier one.
* **Paper Pattern:** This is where things get really fun! Instead of plain green, try using patterned origami paper. A paper with a subtle floral print, a geometric design, or even a textured look can dramatically change the feel of your ribbon. Think about how the pattern will appear as it twists. A pattern that has a directional flow might create an interesting effect.
* **Colour:** Of course, you don’t have to stick to green! Experiment with different shades of green, or try other colors that complement your project. A deep emerald, a vibrant lime, or even a pastel mint can all yield beautiful results. You could even use two different colored papers, one for each side of the ribbon, for a unique dual-tone effect, though this would require a slightly different starting technique.
Displaying and Gifting Your Twisted Ribbon
Your handmade twisted paper ribbon is a charming accent that can be used in so many ways. Here are a few ideas for how to display or gift your creations:
* **Cardmaking and Scrapbooking:** This is a classic use! Attach your ribbon to the front of handmade cards for an elegant touch. It can frame a central image, outline an area, or simply add a decorative border to a scrapbook page.
* **Gift Wrapping:** Instead of traditional ribbon, use your origami creation to tie up a small gift. It adds a personal, artisanal feel to any present. You could even attach it to the gift tag for an extra flair.
* **Decorations:** String several of these ribbons together to create a festive garland or mobile. They also look lovely adorning small decorative boxes, journals, or even as embellishments on DIY home decor items.
* **Gifted as a Standalone Item:** A single, beautifully crafted ribbon can be a lovely small gift in itself, perhaps presented in a small box or bag. It’s a thoughtful gesture that shows you’ve put time and care into it.
I hope you’ve enjoyed this journey into creating twisted paper ribbons. It’s a simple yet effective model that offers a lot of creative freedom. Remember, the most important ingredient is your enthusiasm. Happy folding!
Conclusion
Congratulations on completing your beautiful Twisted Paper Ribbon! We hope you enjoyed this simple yet elegant origami project. Don’t worry if your first attempt isn’t perfect; every fold is a step in your origami journey, and practice makes progress. We’d love to see your finished Twisted Paper Ribbon – feel free to share a photo! For your next challenge, why not try this ribbon in a vibrant red or a sunny yellow? Or perhaps experiment with different paper textures for an even more unique look. There are countless paper projects waiting for you to discover. Happy folding!